🚙 Elevate Your Adventure with Style!
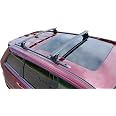
The BRIGHTLINES Heavy Duty Anti-Theft Premium Aluminum Roof Bars are specifically designed for the 2011-2021 Jeep Grand Cherokee with roof black plastic moldings. These crossbars feature a stylish aero wing shape that reduces wind noise, a robust load capacity of 165 lbs, and an easy installation process. With a patent-protected design and lockable features, they ensure your gear is secure while you enjoy the open road. Plus, you get a one-year limited warranty and dedicated U.S. customer support.


| Color | BLACK |
| Brand | BRIGHTLINES |
| Item dimensions L x W x H | 48 x 7.75 x 7.75 inches |
| Is Foldable | No |
| Load Capacity | 165 Pounds |
| Mounting Type | Roof Mount,Bolt Mount,Roof Bars,Rails,Crossbar Mount |
| Manufacturer | BrightLines |
| UPC | 810366030739 |
| Item Weight | 13.47 pounds |
| Product Dimensions | 48 x 7.75 x 7.75 inches |
| Manufacturer Part Number | BL15-1 |
B**.
Sexy!
Perfect fit and installation for 2021 grand cherokee. The top covers take a bit of work to slide off before installing and to put back on after, but once mounted these are very secure. I use mostly for transporting a canoe with additional tie downs front and rear.
F**R
Excellent roof rack that's rated for 165 lbs.
Nice roof rack that was easy to install on my 2021 Grand Cherokee 80th anniversary. I was afraid there might be some damage, because the box was destroyed. Turns out no damage and all parts were there! Looks like it will carry skis, canoes, kayaks, etc. very well.
D**B
Save $300 and buy these
Got these for my jeep grand Cherokee limited and though they were a little fussy to install, they sure beat the Mopar $400 model I had on my previous jeep. Carries a 16 for quite nicely and the rubber rail tops prevent scratches to the boat
A**T
Great company service and rails look real slick and modern.
I bought these roof rails for a trip we are going on and they got delivered very quickly, the rails went on easy with no issues but the rail end caps did not lock correctly. I wrote to the seller, not amazon who sold them and the customer service was the best I have ever dealt with. The gentleman listened to my issues with the caps not locking and said he would expedite a new set to be sent out on them. I got it on two days, those caps fit and locked perfect, and I sent the others back for them to review. I have not really used the racks much so why I gave a 4 and not a 5 rating. Great company to deal with, fast service and they made the issue right. Would deal with them again.
S**T
Nice rack, awful instructions
I have a 2014 Jeep Grand Cherokee with factory-installed brightside roof rails, and this rack does fit it (I just installed mine). This appears to be the same roof rack as the mopar rack. One detail that I wanted to know: their construction. The foot/base on each side is plastic, but the locking mechanism (the inside stuff that hooks to the rails on your roof) and the cross bar (that your kayak, etc. will hook to/rest on) are metal. Overall, the rack seems well constructed. It takes some effort to put it up, though, given the less than perfect instructions. Here's what I learned:1. First, I followed the other reviews and put the small edge of each cross bar facing toward the back of the vehicle--like an airplane wing.2. The slightly shorter bar fits the rails at the BACK of my jeep. Others said front, but the feet don't have the reach for the bar's width up there. I was left with one bar that didn't seem to fit anywhere. I breathed a sigh of relief once I took the keyed end part off and slid the top plastic strip out of the rail to expose the screws and saw one screw which (if loosened) allows the feet to be moved closer or farther apart. I still could only get the shorter rail to fit the back of my roof (then only with both screws on each foot loosened a lot--after you get the fit, tightening them up makes it snug to the roof); the longer one easily fit the front part.3. Something the instructions don't tell you--one of those two screws above each foot controls the "jaws" of the locking mechanism (what pulls the cross bar/rail tight to the car roof). I had to loosen that screw (the one toward the OUTSIDE of the bar, on each end of it) almost all the way. I'm talking look at the end of that screw sticking through the nut on the bottom of the foot and unscrew it(from the top) until the bottom end is even with the nut (I didn't need to unscrew it all the way, though). That loosening allows the "jaws" of the roof rail to come out enough so you can hook it into the rail installed on your car roof. Loosen each side, place it in the rail on your roof, then start tightening each screw. After some tightening, you can slide these cross bars around to get the spread you want. They shouldn't come up off the roof rail, though, as they're locked in now.4. After you screw these down tightly (watch out not to strip out the allen screws), shake your car with them and make sure they're attached firmly. I don't think I'll be taking these on and off--they look nice (all black), and taking them on and off would be a bit of effort. Now, slide the black rubber strip you pulled off the top in from the side (leave the keyed end piece off), little by little. I was able to do this pretty efficiently, but I could see where others had some issues trying to push it in from the top. I think sliding it in from the side is key here. Then, lock the end piece back into place, store the keys and allen wrench in your car, and you're good to go. By the way, the keyed part is only to prevent (it seems) someone from unscrewing this. It is not a quickly release function.UPDATE (June 2013): The rack rails seemed to work great in heavy use--I drove 300+ miles at highway speeds with 2 kayaks on them (around 100 lbs of boat up there on my malone seawing brackets), and the rack held it all. Rain, coastal wind, high speeds, and reduced aerodynamics didn't seem to phase these rails.UPDATE (Oct 2014): The rack rails have transported my kayaks on the malone brackets many times, and haven't loosened up or had any problems. I even made a short drive (out of necessity) with three kayaks mounted/tied to the rack rails, and no problems. Also, no fading or rust. Still very pleased with this purchase.UPDATE (April 2022): The racks are still going strong and holding 2 kayaks for hours on the highway. The rubber strip on the top of one flew off (they pop into the rail, and can pop out if not pushed in all the way), but that doesn't seem to affect it much. The metal rack remains and still holds the kayak v-racks and kayaks. I still think it is a great purchase!
D**O
Great Product. Highly Recommend. My tips for easy and accurate installation.
Like other reviews, the instructions provided with this product are minimal at best - but this is a very good product and a very good value given the price. I was prepared to spend more - but now seeing the product and comparing it to others there is no need to do so. I am very mechanically inclined but even if I wasn't the installation should take no more than 30mins. My suggestions to make your install correct and easy:• My bars were clearly marked but if yours should not be, note which bar is the front (longer) and which is the back (shorter).• The bars themselves are similar in their profile design to an airplane wing meaning the rounded or blunt edge should face forward and the tapered edge should face backward when installed. This is important so as to eliminate air friction and inherent wind noise especially at higher speeds. Both of my bars were clearly marked which edge is to face forward• There is no need like some reviews suggest to remove entirely the rubber top strip on each bar. Keep the end caps with locks in place and instead simply lift up a 6" strip of the rubber top strip on both ends of each bar so you can see and access the two screws underneath• The outer-most screw on the end of each bar is used to tighten and snug the 'L' shaped metal bracket ('L' shaped as viewed from its profile) which slots in from the side and under your existing rooftop rail edges. The inner-most screw on the end of each bar is used after the bar is attached to the rail to then tighten and snug the black plastic 'foot' of each bar so that it is properly aligned with the bar itself. This inner-most screw is what you don't want to loosen more than a turn or two in advance as it can come out (I did this and it was easily corrected but took a few more minutes)• Before loosening any of the screws I suggest laying each bar on the roof rails so each bar 'foot' is laying on top of the rail on each side. Then while watching closely the metal 'L' shaped bracket, begin loosening the outer-most screw and continue loosening it until the 'L' bracket moves outward enough and clears the edges of your roof rail so it can slot in and under the rail edges. This is the best way to know how much to loosen the outer-most screw. Once the 'L' bracket can be slotted in and under the rail edges, begin tightening the outer-most screw until the 'foot' is fully secured to the rail. Do both 'feet' on each end of the bar• Once the feet of each bar are securely attached to the rail then begin tightening the inner-most screw of each 'foot' and this will tighten and align the 'foot' to the bar itself• Last step is to push the 6" section of rubber strip on the end of each bar back into their grooves. This is not so difficult and just entails working the rubber strip from the inside to the outside of each bar. Press and fit, press and fit, press and fit.• Like other reviews, I could find no purposely function of the locking mechanisms. For my installation steps explained above, I tried it with the locks 'opened' and with them 'locked' and it seemed to make no difference
Trustpilot
4 days ago
1 week ago